
At 1500 W of AC output, a 12 V inverter pulls about 134 A from the battery, assuming 93% efficiency. That is why the safe answer to “how to make a 12v dc to 220v ac inverter” has two parts. The circuit is an oscillator or PWM controller, switching MOSFETs, a transformer or boost stage, a filter, and protection. The risk is the real problem: 220 V can kill, and a 12 V battery can deliver hundreds of amps into a fault.
Quick answer
You can build a small 12 V to 220 V inverter from an oscillator, MOSFETs, and a transformer. For anything that runs real appliances, a certified commercial unit is safer. Converting 220 V AC to 12 V DC is a different job and needs an isolated, regulated power supply.
- Best for learning: a low-power homemade build on a bench
- Best for appliances: a certified pure-sine inverter
- Battery current in amps equals AC watts divided by 12 V and efficiency. A 1000 W load at 85% efficiency draws about 98 A.
- Fuse the battery cable close to the battery, and size cable for the fuse, not just the load.
- Pure sine wave suits motors, chargers, and electronics. Modified sine wave can cause heat and buzzing.
- 12 V gets impractical above roughly 2000 W. Use 24 V or 48 V instead.
- AC to 12 V DC needs an isolated, regulated supply, not just a rectifier.
- How does a 12 V DC to 220 V AC inverter work?
- What circuit blocks and components are needed?
- Modified sine wave or pure sine wave?
- How do I calculate battery current?
- What battery capacity is needed?
- Why must battery voltage match the inverter?
- How do I select MOSFETs, transformer, fuses, cables, and cooling?
- Worked example: a 600 W inverter
- What protection is required?
- Can a homemade inverter power fridges and electronics?
- Grounding, isolation, and the pre-power checklist
- How to test the inverter
- How do I convert 220 V AC to 12 V DC safely?
- What do owners say?
- Frequently Asked Questions
How does a 12 V DC to 220 V AC inverter work?
An inverter switches the battery’s DC on and off very fast, steps the voltage up, and shapes the result into AC. Three jobs happen in order: switching, step-up, and filtering.
First, an oscillator or PWM chip makes a timing signal. It drives MOSFETs that flip the current direction through a transformer winding. Second, the transformer raises the voltage. A 220 V RMS sine wave peaks near 311 V (220 x 1.414), so the output stage must handle that peak. Third, filters smooth the output. Without them, you get a harsh, spiky waveform.
Efficiency matters here. Many consumer inverters run at roughly 85% to 90% efficiency, according to the sources behind this guide. But efficiency changes with load. At very light loads, the inverter’s own idle draw eats a bigger share of the power, so the real figure can fall well below the headline number.
What circuit blocks and components are needed to build a 12 V inverter?
You need six blocks: a controller, a driver, power switches, a magnetic or boost stage, an output filter, and protection. Each one fails in its own way, so none are optional.
| Block | Job | Common failure point |
|---|---|---|
| Oscillator / PWM controller | Sets frequency (50 Hz or 60 Hz) and timing | Frequency drift under load |
| Gate drivers | Switch MOSFETs hard and fast | Slow switching causes heat |
| Power MOSFETs | Carry the full battery current | Overheating, shoot-through |
| Transformer or boost stage | Raises 12 V to 220 V | Saturation, overheating |
| Output filter | Smooths the waveform | Wrong values, ringing |
| Protection | Stops faults from becoming fires | Left out to save cost |
Low-frequency transformer versus high-frequency boost design
A low-frequency design uses a heavy iron-core transformer at 50 or 60 Hz. It is simple, tolerates surges well, and is easy to understand. It is also heavy.
A high-frequency design first boosts 12 V to a DC bus near 311 V using a small ferrite transformer. An H-bridge then turns that bus into AC. It is light and gives a clean sine wave, but the control circuit is harder to build and debug.

Should the inverter produce modified sine wave or pure sine wave output?
For most real loads, pure sine wave is the better choice. Modified sine wave is cheaper, but owners repeatedly link it to buzzing transformers, motor heat, and charger problems.
| Approach | Safety | Waveform | Cost | Complexity | Suitable loads |
|---|---|---|---|---|---|
| Commercial pure sine | Certified, with built-in protection | Clean sine | Highest | None (buy it) | Electronics, chargers, motors, TVs |
| Commercial modified sine | Certified, with built-in protection | Stepped, blocky | Lower | None (buy it) | Simple lights, basic heaters |
| Homemade | Depends entirely on you | Usually square or modified | Low to moderate | High | Learning, small resistive loads |
Motors, audio gear, and some chargers can overheat or misbehave on a stepped wave. Do not assume “modified sine” works with everything.
- If you want to learn electronics, build a small unit on the bench and test it with a lamp.
- If you need to run a laptop charger, TV, or fridge, buy a certified pure-sine inverter.
- If your load is above about 2000 W, plan a 24 V or 48 V system.
How do I calculate the battery current for a given AC load?
Use this formula: DC current = AC watts / (12 V x efficiency). The battery must supply more power than the load uses, because the inverter wastes some as heat.
| AC load | Battery current at 85% | Battery current at 90% |
|---|---|---|
| 500 W | about 49 A | about 46 A |
| 1000 W | about 98 A | about 93 A |
| 1500 W | about 147 A | about 139 A |
One verified reference point: at 1500 W and 93% efficiency, the battery supplies about 1612 W, or roughly 134 A at a nominal 12 V.
Also count surge. Refrigerators, pumps, compressors, and motors can pull several times their running watts for a moment at startup. Size the inverter for both running and surge watts, as this inverter selection guide advises.
What battery capacity is needed for a 500 W, 1000 W, or 1500 W load?
The practical formula is: required Ah = load in watts x runtime in hours, divided by (battery voltage x allowable depth of discharge x inverter efficiency). VoltCalcs publishes a calculator built on the same idea.
Here is a worked runtime example. A 12 V 100 Ah battery holds about 1200 Wh. At a 50% usable depth of discharge, that is 600 Wh. At 85% inverter efficiency, about 510 Wh reaches the load. A 500 W load therefore runs for about one hour, before extra losses from cold weather and battery age.
| AC load | Battery for 1 hour (50% DoD, 85% efficiency) |
|---|---|
| 500 W | about 98 Ah |
| 1000 W | about 196 Ah |
| 1500 W | about 294 Ah |
Double the hours, double the Ah. Owners often report shorter runtime than expected because they left out depth of discharge, inverter losses, and startup loads.
Why must the battery voltage match the inverter input voltage?
The inverter’s circuit is designed for one input range. A 12 V inverter should not be connected to a 24 V or 48 V bank, because the overvoltage can destroy the MOSFETs and controller instantly. The reverse also fails: a 24 V inverter will not start on a 12 V battery.
This is also why 12 V runs out of road. At 2000 W, the battery current passes roughly 195 A at 85% efficiency. Cables get thick and expensive, and connection heat becomes a fire risk. Systems above about 2000 W are better designed around 24 V or 48 V, which cuts current by half or three-quarters.
How do I select MOSFETs, a transformer, fuses, cables, and cooling?
Pick every part for the worst case, not the average. Size from the battery current first, then add headroom.
- MOSFETs: Choose very low on-resistance and a voltage rating well above the spikes. At 60 A, a 5 milliohm device wastes about 18 W (I squared x R). Parallel several devices to share the heat.
- Transformer: Rate it above your continuous load, with extra margin for surges. An undersized core saturates and overheats.
- Fuse: Use a DC-rated fuse in the positive cable, as close to the battery terminal as you can. Rate it for about 125% of expected current.
- Cables: Size them for the fuse rating. Keep them short. Voltage drop is a leading cause of false low-voltage shutdowns.
- Cooling: Use a heatsink on the MOSFETs and a fan with real airflow. Leave space around the case.
The ElectricalFlux sizing and wiring guide covers cable and wiring practice in more detail.

From the Shop
Common failure points in DIY inverters follow a pattern. Thin cables get warm, voltage sags, and the unit trips on low voltage even with a full battery. A missing fuse turns a small short into a melted cable. Owner reports of commercial units show the same cable issue.
Worked example: a 600 W inverter
Take a 600 W continuous load at 85% efficiency. Battery current is 600 / (12 x 0.85), which is about 59 A. A 125% fuse margin gives about 74 A, so an 80 A fuse is the next standard step up.
Plan for surge at about twice the running load, so 1200 W peak. Choose MOSFETs that carry the 59 A comfortably and a transformer rated above 600 VA. Run a 4-hour load at 50% depth of discharge: 600 x 4 / (12 x 0.5 x 0.85) is about 471 Ah. That is a big battery bank, which shows why runtime planning matters as much as the circuit.
What protection is required against short circuits, overcurrent, low battery, overheating, and reverse polarity?
You need all five. A homemade inverter without them is a fire hazard.
- Short circuit and overcurrent: A DC fuse, plus electronic current limiting that shuts the drive off in microseconds.
- Low battery cutoff: Shut down before the battery is deeply drained. Users often praise this feature on commercial units.
- Overheating: A temperature sensor on the heatsink that trips the output.
- Reverse polarity: A fuse and diode or a reverse-protect MOSFET at the input.
- Overvoltage: Protects against a charger or alternator surge.
Can a homemade inverter safely power refrigerators, motors, chargers, or sensitive electronics?
Usually not. Fridges and motors have large startup surges. Chargers and sensitive electronics need a clean, stable waveform and voltage. A homemade inverter with a square or modified wave and no regulation can damage them or run them hot.
Keep homemade units to simple resistive loads like a lamp, and only after testing. For anything you cannot afford to replace, buy a certified pure-sine unit.
Grounding, isolation, and the pre-power checklist
220 V can cause fatal shock. Mount everything in an insulated, closed enclosure with no exposed mains terminals. Keep the DC and AC sides physically separated. Use a proper earth connection per your local code, and use outlets with a safe, covered design. Provide ventilation for both the inverter and the battery, since batteries can release gas.
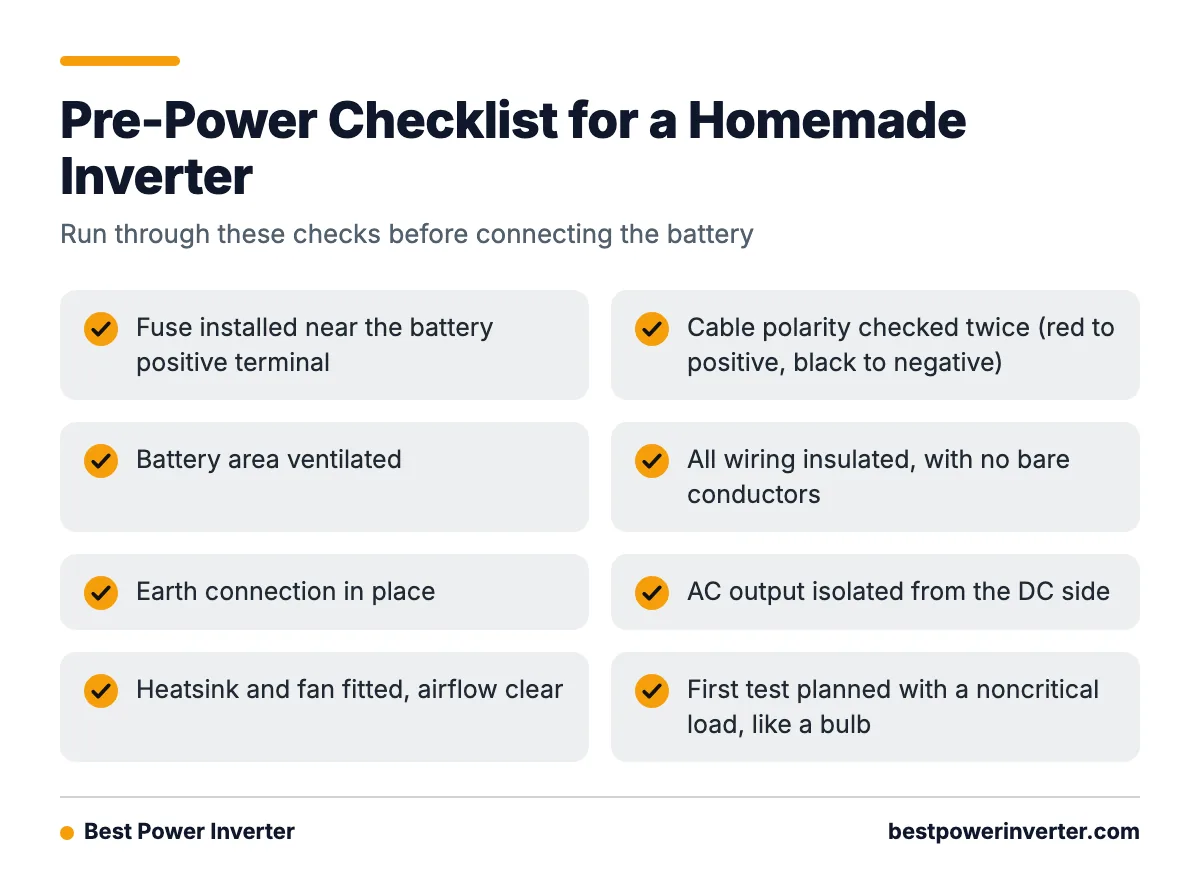
Pre-power checklist
- Fuse installed near the battery positive terminal
- Cable polarity checked twice (red to positive, black to negative)
- Battery area ventilated
- All wiring insulated, with no bare conductors
- Earth connection in place
- AC output isolated from the DC side
- Heatsink and fan fitted, airflow clear
- Low-voltage cutoff set
- First test planned with a noncritical load, like a bulb
How to test the inverter
Test in steps. Start with a current-limited bench supply, not the battery. Set a low current limit and watch the idle draw. Next, connect a dummy load, such as an incandescent bulb, and measure the output voltage with a multimeter rated for mains.
If you have an oscilloscope, check the waveform shape and frequency. Use an isolated probe setup or a differential probe, since a standard probe ground can short the mains. Then raise the load slowly while watching MOSFET temperature. Only after all that, connect the real battery.
How do I convert 220 V AC to 12 V DC safely?
Use an isolated, regulated AC-to-DC power supply. This is not an inverter. An inverter makes AC from DC. This task goes the other way.
The chain works in order: a fuse, a transformer or switching stage for isolation, a bridge rectifier, a filter capacitor, a regulator, and protection. A bare rectifier on mains is unsafe, because it has no isolation and no regulation. A proper supply should include overcurrent, overvoltage, and short-circuit protection.
For most people, a ready-made certified 12 V power supply is the safe route. Pick one with a current rating above your load, such as 5 A for 60 W of devices.
What do owners say?
Owners like
- Pure-sine inverters run sensitive electronics, chargers, TVs, and motor loads more reliably.
- Low-voltage shutdown helps prevent excessive battery discharge.
- Built-in USB ports, cooling fans, overload protection, and clear battery-voltage displays are appreciated.
- Compact units suit vehicle, camping, RV, and emergency backup use.
Common complaints
- Advertised continuous wattage is optimistic, especially when the unit overheats or hits its surge limit.
- Cooling fans are noisy or run continuously under moderate loads.
- Modified-sine models are linked to buzzing transformers, motor heat, and charger incompatibility.
- Undersized cables cause voltage drop and nuisance low-voltage alarms.
- Real-world runtime is shorter than expected when battery capacity, depth of discharge, losses, and startup loads were not counted.
Summarised from owner reviews and long-term user reports; individual experiences vary.
Frequently Asked Questions
How to make 12v dc to 220v ac inverter?
Build or buy a unit with an oscillator or PWM controller, MOSFETs, a transformer or boost stage, an output filter, and full protection. Fuse the battery cable, use thick short cables, and test with a current-limited supply and a bulb first. For real appliances, a certified commercial pure-sine inverter is safer than a homemade one.
How to convert 12v dc to 220v ac?
Switch the 12 V DC through a transformer using MOSFETs driven at 50 or 60 Hz, or boost it to about 311 V DC and chop it into AC with an H-bridge. Then filter the output. Size the battery by dividing the load watts by 12 V and efficiency to find the current.
How to convert ac to dc power 12v?
Use an isolated, regulated 220 V AC to 12 V DC power supply. It steps the voltage down, rectifies it, filters it, and regulates it, with overcurrent, overvoltage, and short-circuit protection. A rectifier alone is not safe, because it lacks isolation and regulation.
Sources