
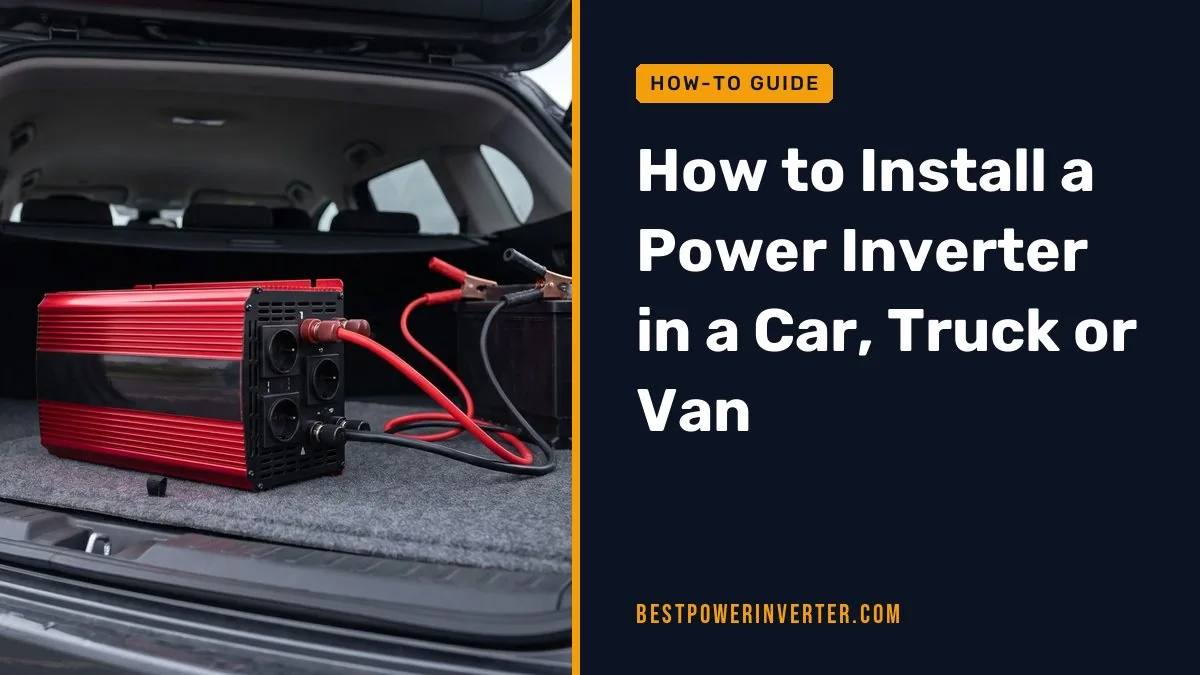
Many owners plug a large inverter into the 12V socket and blow the fuse. Keep socket use to about 150-200 W; anything bigger needs heavy cable straight to the battery, an inline fuse near the positive terminal and a solid ground.
Quick answer
Plug in for small loads like a laptop or phone charger. Hard-wire for anything above roughly 200 W. Size the cable and fuse to the inverter’s DC input current, keep the cable short, and mount the unit where air can move around it.
- Best for laptops and chargers: plug-in unit, under 150 W
- Best for power tools and small appliances: hard-wired, 600-1500 W
- Best for long engine-off use: hard-wired with an auxiliary battery
- A socket fused at 10-15 A can only supply about 120-180 W at 12V.
- DC amps = AC watts ÷ 12 ÷ efficiency. A 1000 W load pulls roughly 90-100 A.
- The fuse protects the cable, so it goes within about 7 inches (18 cm) of the battery positive terminal.
- Shorter cable means a thinner gauge works. Longer runs need thicker wire to limit voltage drop.
- Do not run big loads for long with the engine off. A starting battery tolerates deep discharge poorly.
- Plug-in or hard-wired?
- What size inverter do you need?
- Tools and parts checklist
- What size wire and fuse do you need?
- Where is the best place to mount an inverter?
- How to connect an inverter to the car battery
- Engine running, battery drain and second batteries
- Modified or pure sine wave?
- Testing the installation
- Common mistakes and safety risks
- What do owners say?
- Frequently Asked Questions
Can I just plug an inverter into my car’s cigarette lighter?
Yes, but only for small loads. The socket circuit is commonly fused at 10-15 A, sometimes 20 A. Multiply amps by volts and you get the limit: 10 A × 12 V = 120 W, and 15 A × 12 V = 180 W.
That is why a 300 W inverter blows the socket fuse. At 300 W it wants about 25-30 A. The fuse opens long before the load is happy. The thin wiring behind the socket was never built for that.
Pick your install method:
- Phone, laptop, camera chargers (under 150 W): plug into the 12V socket.
- Power tools, small TV, blender, mini fridge (200-1500 W): hard-wire to the battery.
- Microwave, coffee maker, long camping use (1500 W+ or hours of runtime): hard-wire to an auxiliary battery with an isolator or DC-DC charger.
How do I know what size inverter I need for my devices?
Add up the running watts of everything you will use at the same time. Then add headroom for startup surge. Motors in tools, pumps and fridges can pull two to three times their running watts for a moment.
Look at the label on each device. It lists watts, or amps and volts. Multiply amps by 120 V if only amps are shown. Pick an inverter whose continuous rating is at least 20% above your total load.
How much current will it pull from the battery?
Use this formula: DC amps = AC watts ÷ 12 V ÷ efficiency. Inverters commonly run at 85-90% efficiency, so a 1000 W load draws roughly 90-100 A from a 12V battery. A quick shortcut is watts ÷ 10.
Worked example: a 1000 W inverter running a 600 W load
- 600 W ÷ 12 V = 50 A at 100% efficiency.
- At about 85% efficiency: 50 ÷ 0.85 ≈ 59 A. Call it 60 A.
- The inverter can pull nearly 100 A at full load, so use 4 AWG cable and a fuse around 100-125 A. Follow the manual if it says otherwise.
- On a 100Ah battery, a lead-acid bank should stay above 50% charge. That is about 50 Ah usable. 50 Ah ÷ 60 A ≈ 50 minutes at best. Real runtime is shorter, because high draw reduces usable capacity.
Now the catch. That math applies to a deep-cycle battery. A starting battery is built to deliver a short burst, not to be drained. Using 50 Ah from it will likely leave you stranded.
Tools and parts checklist
Buy everything before you start. Kits with thin cable are a common complaint, so check the gauge printed on the wire.
- Copper cable (red positive, black negative), sized from the table below
- Inline fuse holder or breaker, rated for the full DC current
- Copper lugs that match the cable gauge and stud size
- Hydraulic or hammer crimper (pliers will not make a safe crimp)
- Heat-shrink tubing and a heat gun
- Rubber firewall grommet and split loom for protection
- Wrench set, wire stripper, multimeter
- Zip ties or clamps for securing the cable
- Fuse and terminal covers

What size wire (gauge) and fuse do I need to hard-wire an inverter to the battery?
It depends on inverter wattage and cable length. The table below targets a voltage drop of about 3% (roughly 0.36 V on a 12V system) at full load, using copper cable and the same length for positive and negative. The currents assume about 85% efficiency.
The figures are general guidance. Always check the inverter manufacturer’s manual, which overrides this chart.
| Inverter size | Approx. max DC current | 3 ft one-way | 6 ft one-way | 10 ft one-way | Typical fuse |
|---|---|---|---|---|---|
| 300 W | about 30 A | 10 AWG | 8 AWG | 6 AWG | 40 A |
| 600 W | about 60 A | 8 AWG | 6 AWG | 4 AWG | 80 A |
| 1000 W | about 100 A | 4 AWG | 4 AWG | 2 AWG | 100-125 A |
| 1500 W | about 150 A | 2 AWG | 2 AWG | 1/0 AWG | 150-175 A |
| 2000 W | about 200 A | 1/0 AWG | 1/0 AWG | 2/0 AWG | 200-250 A |
Why does the fuse sit so close to the battery?
The fuse protects the cable, not the inverter. If the cable shorts to the body anywhere between the battery and the fuse, nothing stops the battery from feeding the fault. Marine and RV wiring guidance such as ABYC calls for the fuse or breaker as close as practical to the positive terminal, commonly within 7 inches (18 cm).
Size the fuse above the inverter’s maximum input current but below the cable’s current rating. A fuse that is too large lets the cable overheat. One that is too small blows on startup surges.
Where is the best place in a car, truck or van to mount an inverter?
Mount it as close to the battery as you can while keeping it dry, cool and ventilated. A short DC cable is more important than a short AC cord. AC can travel a longer distance with little loss. DC at high current cannot.
- Good spots: under a front seat, in a cargo area near the battery, in a van’s side compartment with open airflow.
- Bad spots: inside the engine bay, near fuel lines or tanks, under piled-up gear or blankets, anywhere that gets wet.
Leave a few inches of clear space around the vents. Inverters make heat, and the fan needs air. Fasten the body firmly, because a loose 10-pound unit becomes a projectile in a crash. Keep gasoline cans, propane and other flammables away.
How do I connect an inverter to the car battery step by step?
Work with the inverter switched off and the engine off. Follow this order every time.
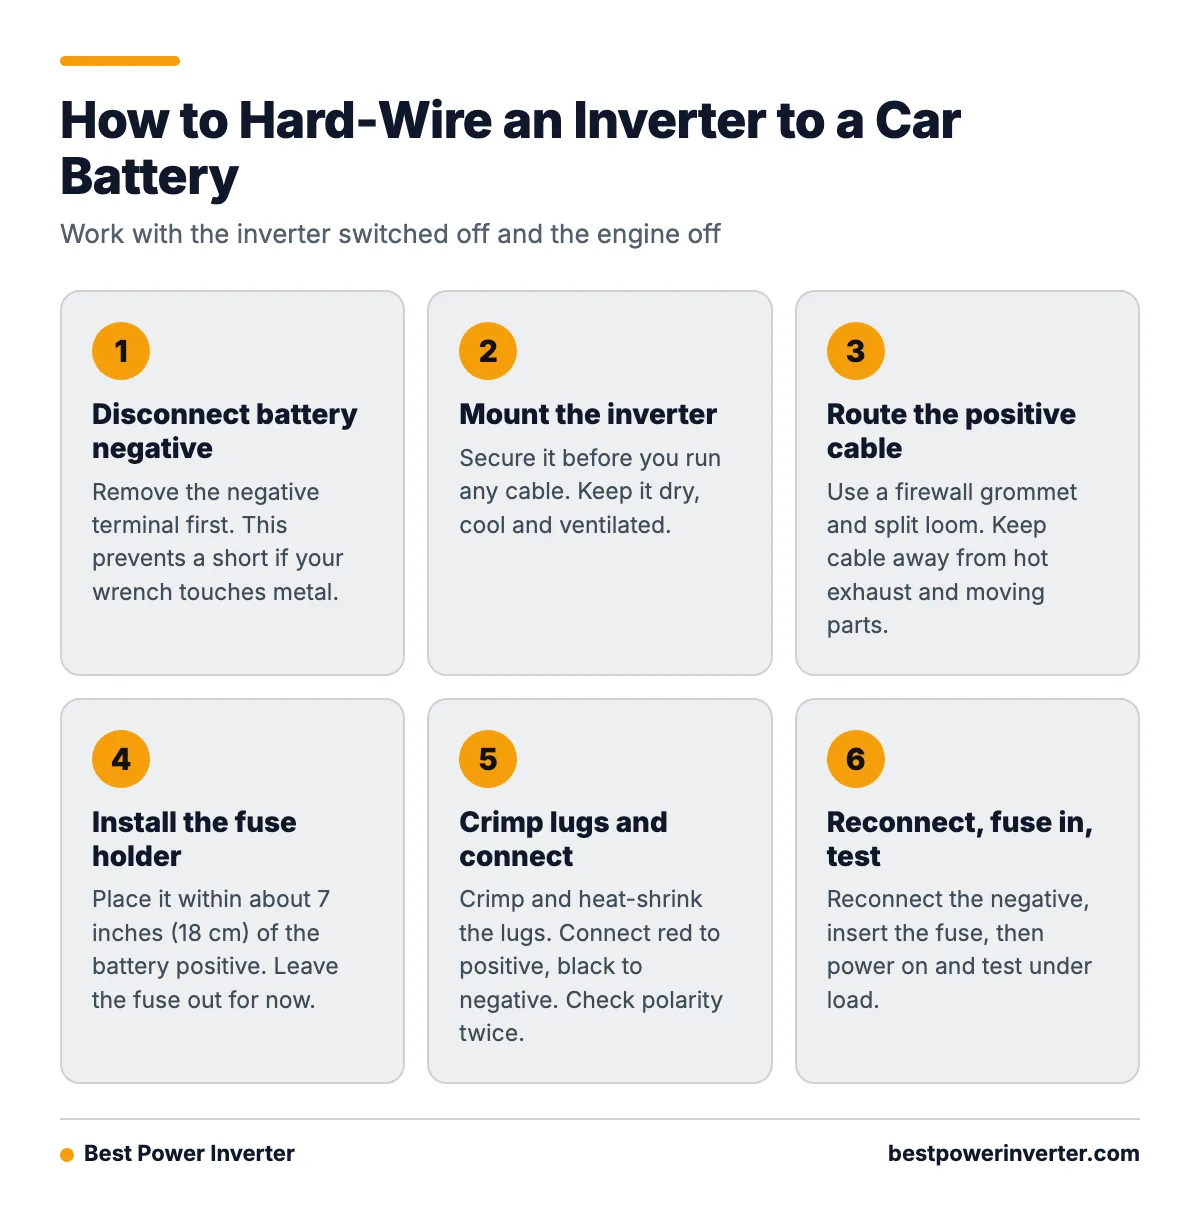
- Pre-install check. Confirm the inverter’s rated input, your cable gauge, fuse rating and mounting spot. Cut the cable to length before crimping.
- Disconnect the battery negative. Remove the negative terminal first. This prevents a short if your wrench touches metal.
- Mount the inverter. Secure it before you run any cable.
- Route the positive cable. Run it from the battery area to the inverter. To enter the cabin, pass it through an existing firewall grommet or one you install in a clean hole. Never push bare cable through raw sheet metal. Sharp edges cut insulation over time. Use split loom and keep the cable away from hot exhaust parts and moving parts.
- Install the fuse holder. Place it within about 7 inches (18 cm) of the battery positive terminal. Leave the fuse out for now.
- Crimp and seal the lugs. Strip the cable, crimp the lug, and cover it with heat-shrink. Tug each lug hard. It should not move.
- Connect the negative. Use a cable of equal size. Keep it short. Attach it to the battery negative or to a bare, clean chassis point, sanded to bare metal and bolted tight. Do not use a thin factory bolt or painted surface.
- Attach the cables to the inverter. Red to positive, black to negative. Reverse polarity can destroy the inverter instantly. Double-check before tightening.
- Reconnect the battery and insert the fuse. Reconnect the negative, then put the fuse in. A small spark at the inverter terminals on first connection is normal, since its capacitors charge.
- Power on and test. See the testing section below.
Engine running, battery drain and second batteries
Does the engine need to be running when I use an inverter?
For small loads, no. For anything above a few hundred watts, yes. The alternator supplies the current while the battery stays topped up. With the engine off, the battery alone feeds the load.
Modern start-stop and smart alternator systems add a wrinkle. The alternator may output less at times, and the engine may shut off at a stop. A heavy load can then pull voltage down. If your vehicle has these systems, keep loads modest.
Will an inverter drain or damage my car battery, and how long can I run it with the engine off?
It can drain it fast. Many guidelines advise avoiding discharge below about 50% for lead-acid batteries, and starting batteries handle deep discharge poorly. A 100Ah battery gives about 50 Ah usable at best.
Most inverters sound a low-voltage alarm around 10.5 V and shut off near 10 V, though thresholds vary by model. That is too low to start an engine reliably. Watch voltage yourself, and stop well before the alarm.
As a rule: a 100 W load for a short time is fine. A 600 W load for an hour is not, on a starting battery.
Do I need a second battery or isolator for a bigger inverter?
Yes, if you want to run a large load with the engine off. An auxiliary deep-cycle battery, charged through an isolator or DC-DC charger, keeps your starting battery safe. The inverter connects to the auxiliary battery, not the starter.
| Use case | Setup | Why |
|---|---|---|
| Charging a laptop while driving | Plug-in, under 150 W | Within the socket fuse limit |
| Power tools on a job site, engine running | Hard-wired to the starting battery | Alternator supports the load |
| Camping with a fridge or TV overnight | Hard-wired to an auxiliary battery | Protects the starting battery |
| Microwave or 1500 W+ loads | Auxiliary battery bank, DC-DC charger, heavy cable | High current needs a larger battery and thicker wire |
Should I use a modified sine wave or pure sine wave inverter in a vehicle?
Pure sine wave is the safer choice. It produces clean power like a wall outlet. Modified sine wave units cost less, but they can cause problems or damage with some electronics, including motors, CPAP machines and some chargers.
If you plan to run only simple resistive loads like a work light or a basic heater, modified sine wave can work. For laptops, tools with electronic speed control, medical devices or anything you cannot afford to replace, buy pure sine wave.
Testing the installation
Do not skip this. Most failures show up in the first few minutes under load.
Post-install test checklist
- Battery voltage: check at rest. A healthy battery reads around 12.6 V.
- Voltage at the inverter terminals under load: compare to the battery. A drop of more than about 0.3-0.5 V points to thin cable or a poor connection.
- Heat check: after 10-15 minutes under a moderate load, carefully feel the lugs, fuse holder and cable. They should be barely warm. Hot means a loose or undersized connection.
- Ground continuity: use a multimeter to check resistance between the inverter negative and the battery negative. It should read near zero.
- Fuse and cable: look for chafing, loose clamps and exposed copper.
- Fan and alarms: confirm they work, and that the unit is not hot to the touch near the vents.
What are the common installation mistakes and safety risks?
Most fires and failures trace back to a handful of errors. Based on manufacturer guidance and patterns in owner reports, these come up most often.
- Cable too thin or too long. This causes voltage drop, heat and early shutdown.
- No fuse, or the fuse far from the battery. A short before the fuse has nothing to stop it.
- Reverse polarity. Swapped terminals can destroy the unit in an instant.
- Weak ground. A painted or rusty chassis point adds resistance and heat.
- Poor crimps. Hand-squeezed lugs loosen and overheat.
- Blocked vents. Gear piled on the unit leads to overheating and shutdowns.
- Cable through sharp metal. Insulation wears through and shorts.
- Running big loads with the engine off. This is how people end up unable to start.
Troubleshooting quick guide
- Alarm sounds: low voltage or overload. Check the battery and reduce the load.
- Keeps shutting down: inspect cable gauge, length and connection tightness.
- Fuse blows repeatedly: the load exceeds the rating, or there is a short. Do not install a larger fuse to fix it.
- Radio buzz or interference: move the inverter away from the antenna and radio wiring, and route the DC cables away from audio cables.
- GFCI outlet trips: some portable inverters do not play well with GFCI. Check the manual.
What do owners say?
Owners like
- Pure sine wave models run laptops, power tools and small appliances quietly and without interference.
- Hard-wired installs with proper cable feel solid and handle higher loads without tripping fuses.
- Built-in USB ports, remote switches and low-voltage shutdown features are convenient and protect the battery.
- Compact units mounted under a seat or in a cargo area are useful for camping, work trucks and road trips.
Common complaints
- Cooling fans are loud, especially under heavy loads.
- Cheap inverters often fail to deliver rated wattage or shut down early because of overload or voltage drop.
- Plug-in units blow the 12V socket fuse when used with devices above roughly 150 W.
- Battery drains quickly with the engine off, leaving owners unable to start the vehicle.
- Supplied cables are often too thin or too short, forcing owners to buy heavier cable and fuses.
Summarised from owner reviews and long-term user reports; individual experiences vary.
Frequently Asked Questions
How do I install an inverter in a car?
For small loads, plug the inverter into the 12V socket. For anything above roughly 150-200 W, disconnect the battery negative, mount the inverter, run correctly sized positive and negative cable, and fit an inline fuse within about 7 inches (18 cm) of the positive terminal. Ground the negative to the battery or bare chassis metal, reconnect the battery, and test under load.
What does a vehicle power inverter installation need besides the inverter?
You need copper cable sized for the wattage and length, an inline fuse or breaker, crimped lugs, a firewall grommet, and a clean ground point. A crimper and multimeter are also needed. See the parts checklist and the sizing table above.
What is a vehicle inverter install going to cost in parts?
Cost depends mostly on wattage, because heavier cable and larger fuses cost more. Small plug-in units need no extra parts. Hard-wired installs add cable, a fuse, lugs and tools. A larger system with an auxiliary battery and DC-DC charger costs the most. Prices vary by brand and region, so compare current listings.
What is the maximum wattage I can run from a cigarette lighter socket?
Usually about 120-180 W, based on a 10-15 A fuse at 12 V. Some sockets are fused at 20 A, but check your owner’s manual and the fuse box. Do not rely on the number printed on the inverter.
Does the engine need to be running to use an inverter?
Not for small loads for short periods. For large loads, run the engine so the alternator carries the current. Otherwise the battery drains quickly.
Should I use a modified sine wave or pure sine wave inverter in a car?
Choose pure sine wave for laptops, medical devices, tools with electronic controls and anything sensitive. Modified sine wave is acceptable only for simple loads.
Will an inverter kill my car battery?
It can leave you stranded if you drain a starting battery too far. Avoid running big loads with the engine off. For long engine-off use, add a deep-cycle auxiliary battery.